Yes, updating your BIOS for a new CPU is often necessary for compatibility, performance improvements, and bug fixes. Ensure you check your motherboard’s support list, back up your data, and follow the manufacturer’s instructions for a safe update.
This comprehensive guide will help you understand when and why a BIOS update is necessary, how to check compatibility, prepare for the update, perform the update safely, and troubleshoot any potential issues.
What is BIOS?
BIOS (Basic Input/Output System) is the firmware that initializes and tests your hardware components when you start your computer. It also provides runtime services for your operating system and programs. Essentially, BIOS is the bridge between your computer’s hardware and its software. Modern systems use UEFI (Unified Extensible Firmware Interface), which offers more features and a more user-friendly interface than traditional BIOS.
Why Update BIOS for a New CPU?
- Compatibility: Modern motherboards support multiple generations of CPUs. A BIOS update may be necessary to ensure compatibility with newer processors. Without a compatible BIOS, your system may fail to boot or may not recognize the new CPU properly.
- Performance Improvements: BIOS updates can optimize your system, providing better performance and stability for your new CPU. This includes improved power management, enhanced CPU performance features, and better memory compatibility.
- Bug Fixes and Security Patches: Updates often include fixes for known issues and vulnerabilities, ensuring a smoother and more secure experience. This can be crucial for maintaining system integrity and protecting against security threats.
How to Check If You Need a BIOS Update:
Before proceeding with a BIOS update, you need to check if it’s necessary. Here are the steps:
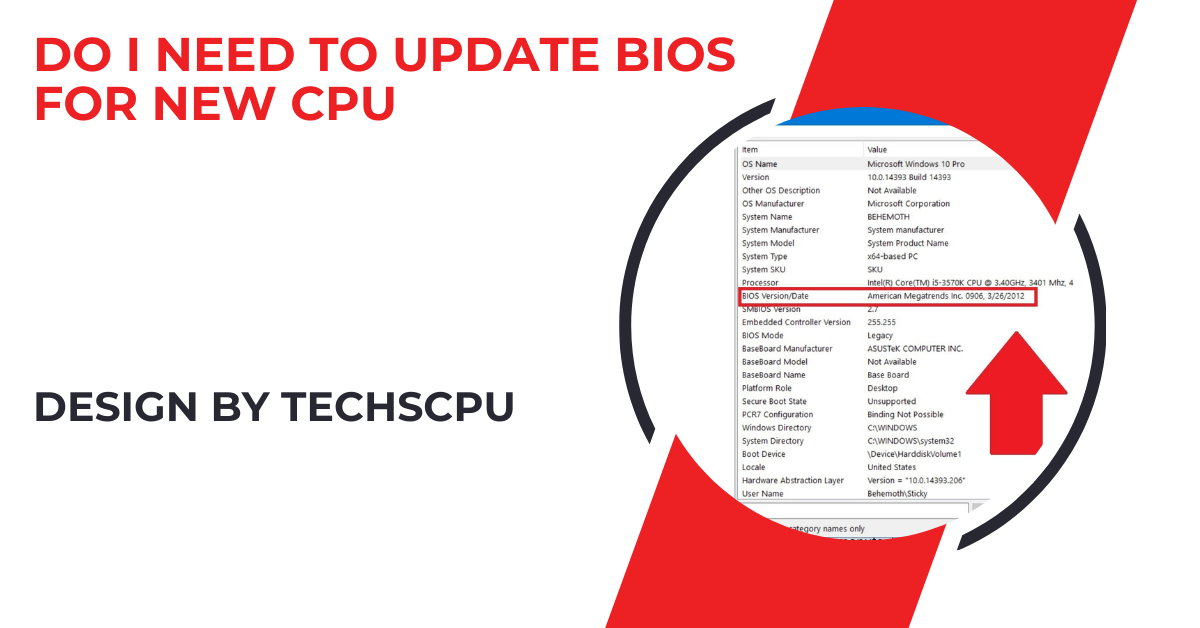
Identify Your Current BIOS Version:
- Restart your computer and enter the BIOS setup (usually by pressing Del, F2, or a similar key during startup).
- Look for the BIOS version information, typically found on the main screen.
- Alternatively, you can use system information tools like CPU-Z or the System Information utility in Windows to find the BIOS version.
Check CPU Compatibility:
- Visit the motherboard manufacturer’s website.
- Find your motherboard model and check the CPU support list.
- Compare your current BIOS version with the recommended version for your new CPU. The manufacturer’s website will usually indicate which BIOS version adds support for new CPUs.
Also Read: Can Cinebench Damage Cpu – A Comprehensive Guide!
Preparing for a BIOS Update:
Backup Important Data:
Updating the BIOS can be risky. It’s crucial to back up your important data before proceeding to avoid data loss in case something goes wrong. Create a system restore point or use backup software to ensure your data is safe.
Power Supply:
Ensure your computer is connected to a reliable power source. A power failure during the BIOS update can render your motherboard unusable. If you’re updating a laptop, ensure the battery is fully charged and keep it plugged in during the update.
Download the Correct BIOS Update:
- Go to the motherboard manufacturer’s website.
- Find your motherboard model and download the latest BIOS update file.
- Follow the manufacturer’s instructions for creating a bootable USB drive if needed.
How to Update Your BIOS:
Method 1: Using a BIOS Flashback Button
Some modern motherboards have a BIOS flashback button, allowing you to update the BIOS without a CPU or memory installed. This method is useful if you encounter compatibility issues that prevent the system from booting.
- Copy the BIOS update file to a USB drive. Ensure the file is named correctly as per the manufacturer’s instructions.
- Insert the USB drive into the designated BIOS flashback USB port.
- Press the BIOS flashback button and wait for the update process to complete. This can take several minutes. Do not turn off the power during this process.
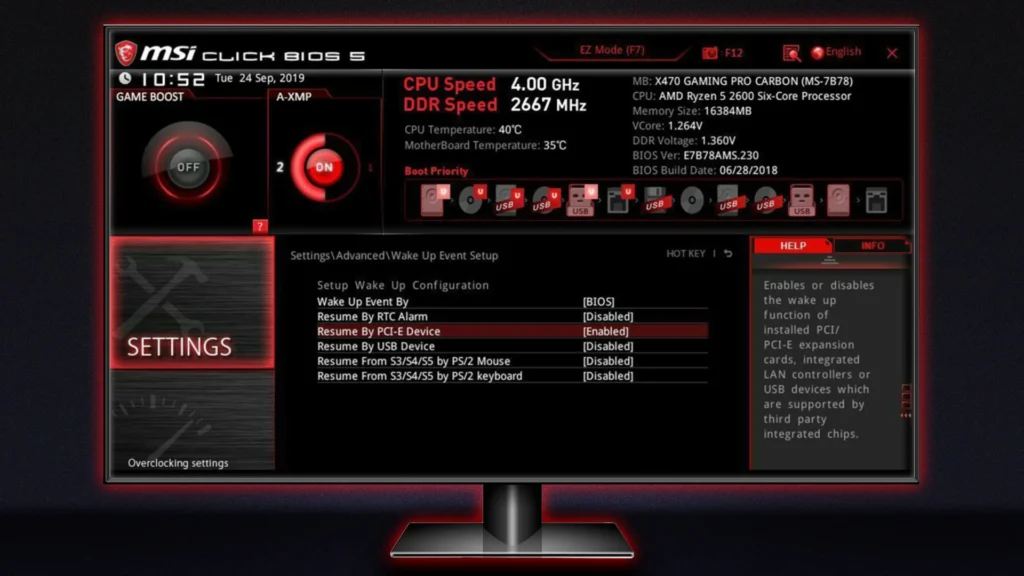
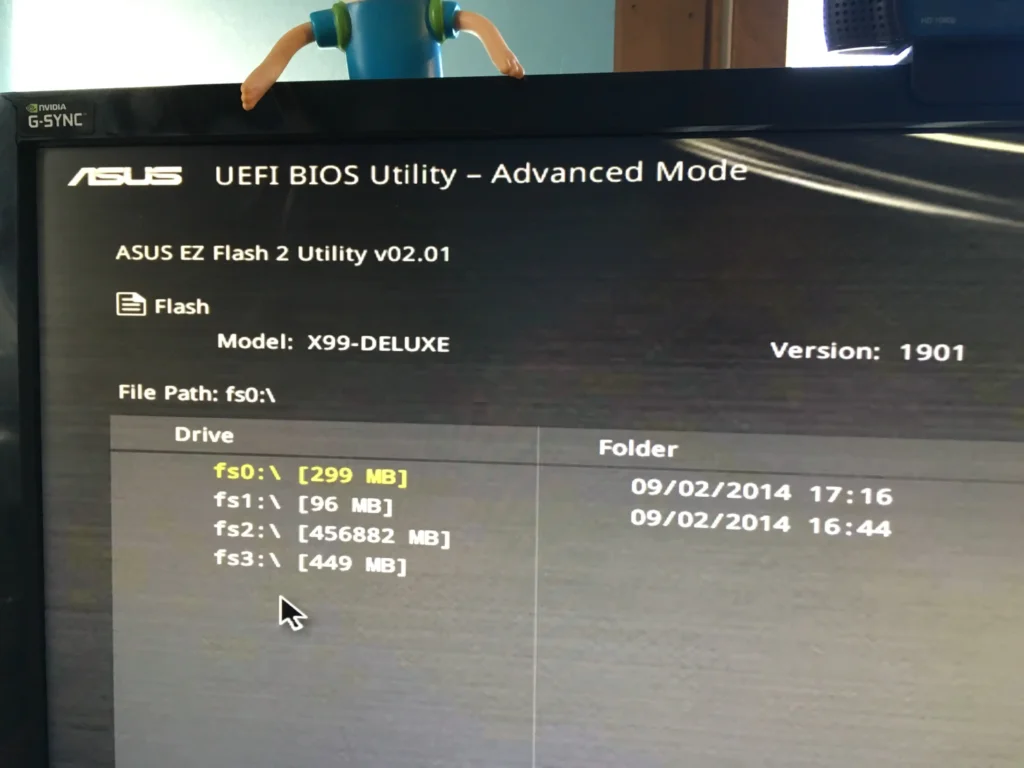
Method 2: Using BIOS/UEFI Interface
- Restart your computer and enter the BIOS setup.
- Navigate to the BIOS update section (usually called EZ Flash, M-Flash, or similar).
- Select the BIOS update file from your USB drive.
- Follow the on-screen instructions to complete the update. The system will reboot during the process.
Method 3: Using a Windows Utility
Some manufacturers provide Windows-based utilities for BIOS updates. This method is convenient if you prefer updating within the operating system.
- Download the utility from the motherboard manufacturer’s website.
- Run the utility and follow the on-screen instructions to update the BIOS. Ensure no other programs are running during the update to avoid conflicts.
After Updating Your BIOS:
- Verify the Update: Restart your computer and enter the BIOS setup to verify the new BIOS version. Check the BIOS version number to ensure the update was successful.
- Load Default Settings: It’s a good practice to load the default settings after a BIOS update. This ensures compatibility and stability. Navigate to the “Load Defaults” or “Load Optimized Defaults” option in the BIOS setup.
- Reconfigure BIOS Settings: If you had customized settings in the BIOS (such as overclocking configurations, boot order, or RAID settings), you’ll need to reconfigure them after loading the defaults.
Troubleshooting Common BIOS Update Issues:
System Won’t Boot After Update:
- Revert to Previous BIOS: Some motherboards have a dual BIOS feature or a BIOS recovery option that allows you to revert to the previous BIOS version.
- Clear CMOS: Reset the CMOS by using the jumper on the motherboard or by removing and reinserting the CMOS battery. This will reset BIOS settings to default.
Error Messages During Update:
- Check File Integrity: Ensure the BIOS update file is not corrupted. Re-download the file from the manufacturer’s website.
- Use Correct USB Port: If using a USB drive, make sure it’s inserted into the correct port specified by the manufacturer.
Update Stuck or Frozen:
- Patience: BIOS updates can take several minutes. If it seems stuck, wait for a while before taking any action.
- Restart: If the update is truly frozen, you may need to restart your computer. This can be risky, so ensure you’ve tried all other troubleshooting steps first.
FAQs
1. What is BIOS?
BIOS (Basic Input/Output System) is firmware that initializes and tests your hardware components when you start your computer, acting as a bridge between your computer’s hardware and software.
2. Why do I need to update BIOS for a new CPU?
Updating BIOS ensures compatibility with newer CPUs, improves performance and stability, and includes bug fixes and security patches.
3. How can I check if my BIOS needs an update?
Identify your current BIOS version by entering the BIOS setup during startup, then compare it with the recommended version on your motherboard manufacturer’s website.
4. What should I do before updating my BIOS?
Backup important data, ensure your computer is connected to a reliable power source, and download the correct BIOS update file from the manufacturer’s website.
5. What are the methods to update BIOS?
You can update BIOS using a BIOS flashback button, through the BIOS/UEFI interface, or with a Windows utility provided by the motherboard manufacturer.
6. What should I do if my system won’t boot after a BIOS update?
You can revert to the previous BIOS if your motherboard has a dual BIOS feature, or reset the CMOS by using the jumper or removing and reinserting the CMOS battery.
Conclusion
Updating your BIOS for a new CPU can be crucial for compatibility and performance. By following the steps outlined in this guide, you can safely update your BIOS and enjoy the benefits of your new processor. Always refer to your motherboard manufacturer’s instructions for the most accurate and specific guidance. With proper preparation and careful execution, a BIOS update can be a smooth and beneficial process, ensuring your system runs optimally with your new CPU.