To apply thermal paste, clean the CPU and cooler with isopropyl alcohol. Then, place a small dot of paste in the center of the CPU and attach the cooler securely.
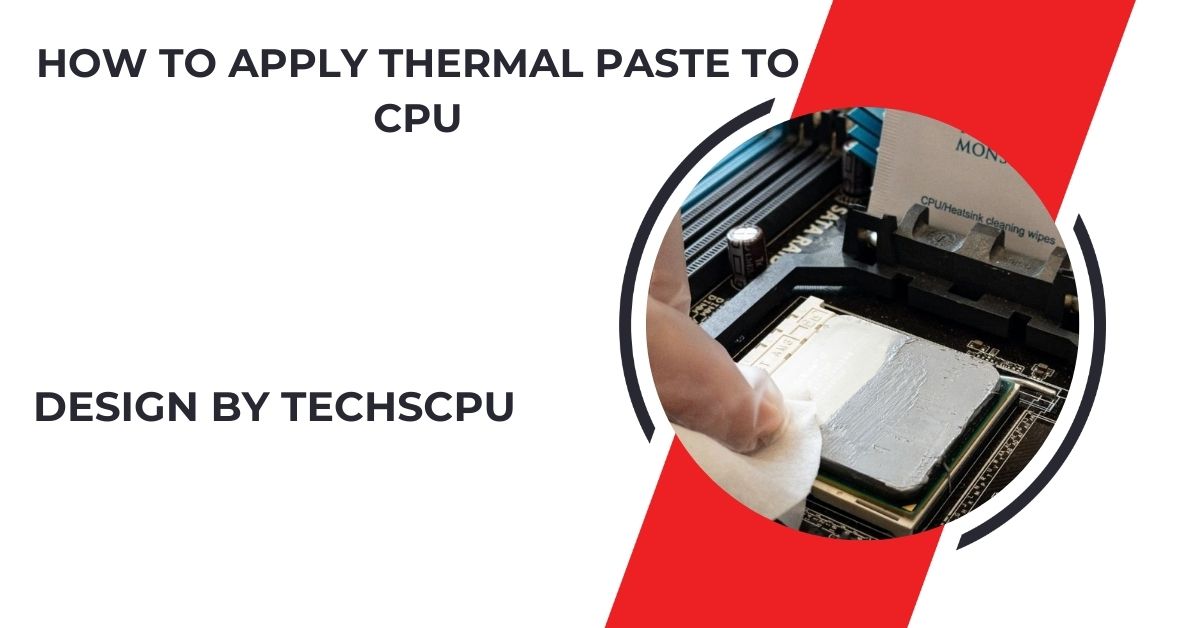
In this guide, we will explain how to apply thermal paste to a CPU step-by-step in simple and easy words.
What is Thermal Paste?
Thermal paste, also called thermal compound or grease, is a material applied between the CPU and cooler to enhance heat transfer. It helps fill tiny gaps between surfaces, ensuring proper contact. Without it, heat dissipation becomes inefficient, leading to CPU overheating, which can cause slowdowns or system shutdowns due to high temperatures.
Why is Thermal Paste Important?
Thermal paste is essential for efficient cooling because it fills air gaps between the CPU and cooler. These gaps reduce heat transfer, leading to overheating. By filling these spaces, thermal paste ensures proper heat dissipation, preventing the CPU from getting too hot, which can result in performance issues or hardware failure.
What You Will Need:
Before applying thermal paste to your CPU, gather the following tools and materials to ensure a successful and efficient process:
- Thermal Paste: This is the key component for transferring heat between the CPU and the cooler. It can be easily purchased online or at a computer hardware store. Make sure to choose a reputable brand for optimal thermal conductivity.
- CPU Cooler: The cooler will be mounted on top of the thermal paste to help dissipate heat from the CPU. Ensure that the cooler is compatible with your CPU socket for proper installation and performance.
- Isopropyl Alcohol (90% or higher): You’ll need high-purity isopropyl alcohol to clean the CPU surface and the base of the cooler, removing any old thermal paste and ensuring a clean surface for the new application.
- Lint-free Cloth or Coffee Filter: These are used to wipe the surfaces clean after applying the isopropyl alcohol. A lint-free cloth or coffee filter is ideal because it doesn’t leave any fibers or particles behind, ensuring a smooth application.
- Plastic Spatula or Card (Optional): Some users prefer using a plastic spatula, credit card, or similar flat object to spread the thermal paste manually. However, this is optional, as the pressure from the CPU cooler usually spreads the paste evenly across the surface.
Having all these materials ready beforehand will help you apply the thermal paste more efficiently and improve the overall cooling of your CPU.
Also read: How To Undervolt Cpu Gigabyte Bios – A Comprehensive Guide!
Step-by-Step Guide to Applying Thermal Paste:
Follow these steps to correctly apply thermal paste to your CPU.
Prepare Your Workspace:
Ensure you’re working in a clean, static-free environment to avoid damaging the CPU or cooler. Dust and static electricity can harm sensitive components. Using an anti-static wristband or regularly touching metal objects can help eliminate static. A tidy workspace will make the process smoother and reduce the risk of making mistakes while handling the CPU and cooler.
Remove the CPU Cooler:
If you’re reapplying thermal paste, begin by removing the CPU cooler. Loosen the screws or unclip the cooler from the motherboard and gently lift it off the CPU. If it’s stuck due to old thermal paste, twist the cooler slightly to break the seal. Be careful not to apply too much force, which could damage components.
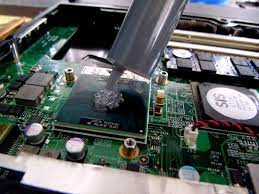
Clean the CPU and Cooler:
Use isopropyl alcohol and a lint-free cloth or coffee filter to remove old thermal paste. Gently wipe the CPU and cooler surfaces until they’re shiny and free of any residue. Allow both surfaces to air dry completely before applying new thermal paste. Proper cleaning ensures better heat transfer and optimal cooling performance for your CPU.
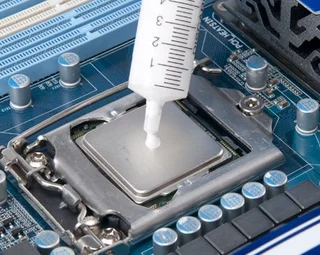
Apply a Small Amount of Thermal Paste:
Squeeze a small dot of thermal paste, about the size of a pea or grain of rice, onto the center of the CPU. There’s no need to manually spread the paste. The pressure from the cooler will evenly distribute it. Applying the right amount is crucial; too much or too little paste can reduce cooling efficiency.
Also read: Intel Lga 1700 Socket Cpu List – A Comprehensive Guide!
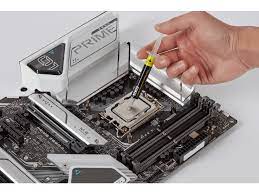
Attach the CPU Cooler:
After applying the thermal paste, carefully align the CPU cooler with the CPU and place it flat on top. Ensure that the cooler sits evenly on the surface. Tighten the screws or clips securely but evenly, applying pressure uniformly to avoid air gaps. Don’t overtighten, as it could damage the CPU or the cooler’s mounting mechanism.
Check Your Work:
Inspect the cooler to ensure it’s properly seated on the CPU without any gaps or uneven areas. Confirm that the cooler’s fan is connected and working as expected. A poorly seated cooler can lead to overheating, so double-check that everything is in place and that the cooler is firmly but evenly secured.
Power On and Monitor Temperatures:
Once everything is assembled, power on your PC and monitor the CPU temperatures using software like CoreTemp or HWMonitor. Let the system run for a while to ensure stable temperatures. If the CPU temperature stays within a safe range, the thermal paste has been applied correctly. If not, recheck the cooler installation and thermal paste application.
Common Mistakes to Avoid:
Applying thermal paste may seem easy, but there are common mistakes that can cause problems.
Using Too Much Paste:
Applying too much thermal paste can lead to serious issues. Excess paste may spill over the edges of the CPU, creating a mess and potentially damaging surrounding components. It can also impair heat transfer efficiency, causing the CPU to overheat. Always remember that a small dot, about the size of a pea, is sufficient, as it will spread when the cooler is installed properly.
Also read: What Is A Core In A Cpu – A Complete Guide!
Not Cleaning Old Paste:
Failing to clean off old thermal paste before applying new paste is a common mistake that can lead to overheating. Any leftover residue can interfere with the new paste’s ability to conduct heat effectively. To ensure optimal performance, always use isopropyl alcohol and a lint-free cloth to thoroughly clean the CPU and cooler surfaces before applying fresh thermal paste.
Not Installing the Cooler Properly:

Incorrect installation of the CPU cooler can significantly affect heat transfer. If the cooler is not seated flat against the CPU, it can create air gaps that hinder efficient cooling. Always check to ensure the cooler is level and securely attached. Double-checking your installation helps maintain optimal temperatures and ensures that your CPU operates within safe limits.
Using the Wrong Type of Paste:
Using an inappropriate thermal paste can lead to poor cooling performance and increased CPU temperatures. Always choose a high-quality thermal paste specifically designed for CPUs. Some types of paste, like those meant for other applications, may not effectively dissipate heat. Using the right product is crucial for maintaining system performance and extending the lifespan of your CPU.
Also read: Why Is My Cpu Fan So Loud – Causes and Quick Fixes!
How Often Should You Reapply Thermal Paste?
Reapplying thermal paste isn’t necessary with every computer use, but certain guidelines can help determine when it’s time to refresh it:
- New Build: Always apply fresh thermal paste when constructing a new computer. This ensures optimal thermal conductivity from the start, which is vital for the system’s performance and longevity.
- Upgrading CPU or Cooler: Whenever you change the CPU or install a new cooler, it’s essential to clean off the old thermal paste thoroughly and apply a new layer. This prevents overheating and ensures effective heat transfer.
- Overheating Issues: If your computer is experiencing overheating, check the thermal paste. It may have dried out or become ineffective over time, necessitating a replacement to restore proper cooling performance.
- Every Few Years: For most users, reapplying thermal paste every 2 to 3 years is sufficient to maintain good performance. Regular checks can help ensure your CPU stays cool, especially during heavy workloads or gaming sessions.
FAQ’s
1. What is thermal paste?
Thermal paste is a substance applied between the CPU and cooler to improve heat transfer. It prevents overheating by filling tiny gaps between the surfaces.
2. Why is thermal paste important?
It helps ensure efficient heat dissipation by filling air gaps between the CPU and cooler. This helps prevent the CPU from overheating, which could lead to performance problems.
3. How much thermal paste should I apply?
Place a small dot of thermal paste, roughly the size of a pea, in the center of the CPU.The cooler will spread it evenly when it’s installed.
4. How often should I reapply thermal paste?
Reapply thermal paste every 2 to 3 years or when you change the CPU or cooler. Regular checks can help maintain optimal CPU temperatures.
5. What happens if I don’t use thermal paste?
Without thermal paste, heat transfer is inefficient, leading to overheating. This can damage the CPU and affect the overall performance of your computer.
Conclusion
In conclusion, applying thermal paste is essential for maintaining optimal CPU performance. By carefully cleaning the surfaces, applying a small dot of paste, and securely attaching the cooler, you ensure effective heat dissipation. Regularly checking and reapplying thermal paste when necessary will help prevent overheating and extend the lifespan of your CPU, keeping your system running smoothly.
Related post
- Also read: How To Reset Cpu – A Complete Guide!
- Also read: What Is A Cpu Do – Understanding the Brain of Your Computer!
- Also read: How To See What Cpu I Have – A Complete Guide to Checking Your CPU Model on Windows, Mac, and Linux!