To remove thermal paste from CPU pins, use isopropyl alcohol and a soft-bristled brush to gently clean the pins, followed by using compressed air to remove any residue. Handle the CPU carefully to avoid damaging the delicate pins.
Thermal paste is essential for maintaining proper heat conduction between your CPU and its cooler. However, accidents happen, and sometimes thermal paste can get onto the CPU pins, which can cause connectivity issues and potentially damage the CPU. Removing thermal paste from CPU pins requires a delicate and careful approach to ensure the integrity of the CPU. This guide will walk you through the steps to safely and effectively remove thermal paste from CPU pins.
Why Is It Important to Remove Thermal Paste from CPU Pins:
Thermal paste is designed to improve the thermal conductivity between the CPU and the heatsink. However, when it gets on the CPU pins, it can interfere with the electrical connections, leading to poor performance or even failure of the CPU.
Properly removing the thermal paste from the pins is crucial to ensure the CPU functions correctly. Even a small amount of thermal paste on the pins can cause significant issues, so it’s important to address this problem promptly and thoroughly.
Tools and Materials Needed:
Before you begin, gather the following tools and materials: isopropyl alcohol (preferably 90% or higher), a soft-bristled brush (such as a toothbrush), cotton swabs, compressed air, a lint-free cloth or paper towel, and an anti-static wrist strap (optional but recommended).
Having these items ready will make the cleaning process smoother and more efficient. Make sure to use high-quality isopropyl alcohol and a soft-bristled brush to avoid damaging the CPU pins.
Safety Precautions:
- Power Off and Disconnect: Ensure your computer is powered off and disconnected from any power source. This prevents any electrical damage or accidental short circuits during the cleaning process.
- Ground Yourself: Use an anti-static wrist strap or regularly touch a grounded metal object to prevent static discharge, which can damage the CPU. Static electricity is a common cause of CPU damage, so grounding yourself is crucial.
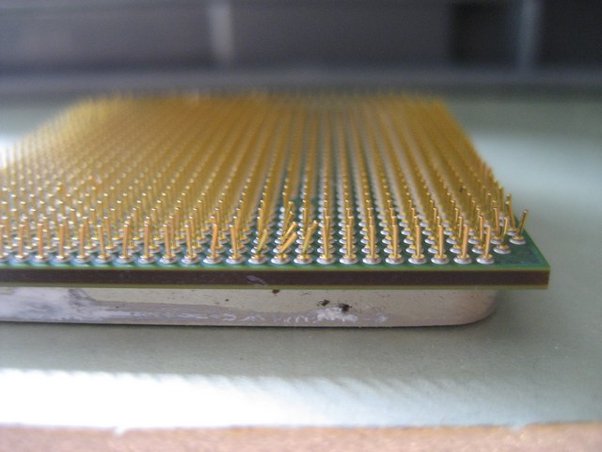
- Handle with Care: CPU pins are extremely delicate. Handle the CPU by its edges and avoid touching the pins directly. This prevents bending or breaking the pins, which can render the CPU unusable.
Step-by-Step Guide to Removing Thermal Paste from CPU Pins:
Prepare Your Workspace:
Set up a clean, well-lit workspace. Make sure you have all your tools and materials within reach. Place the CPU on a soft, static-free surface. A clean workspace helps prevent any additional contaminants from getting on the CPU pins during the cleaning process. Adequate lighting ensures you can see the thermal paste clearly and remove it effectively.
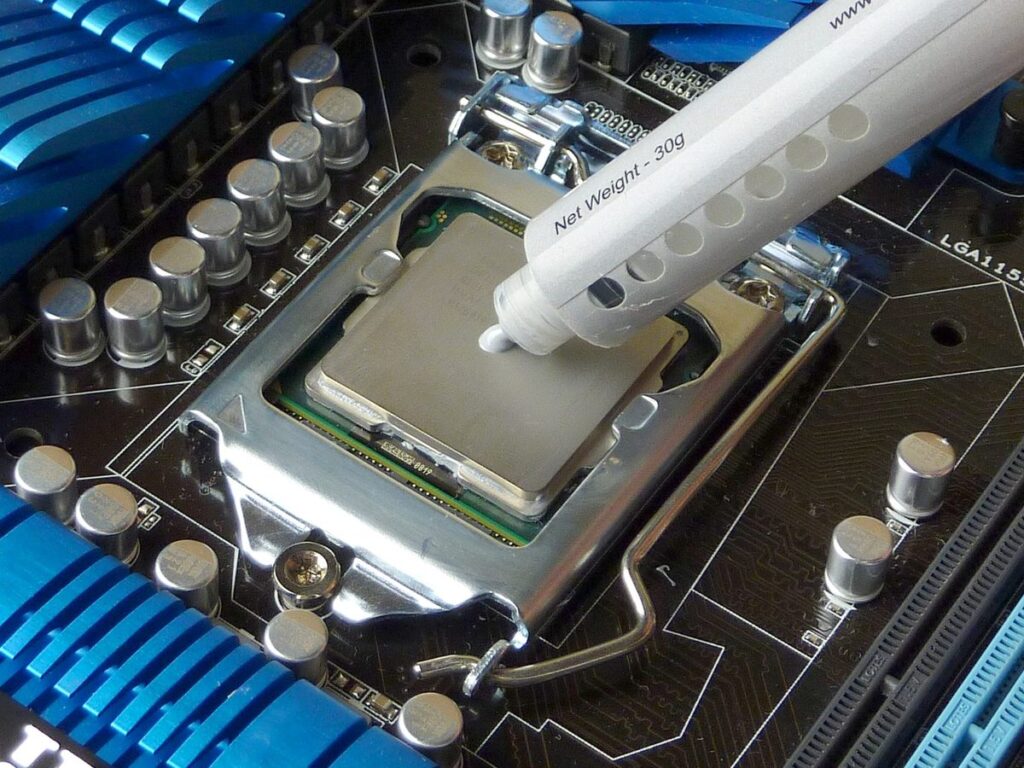
Apply Isopropyl Alcohol:
Dampen a cotton swab with isopropyl alcohol. Be careful not to soak the swab; it should be moist, not dripping. Gently dab the affected area to begin dissolving the thermal paste. Isopropyl alcohol is effective in breaking down thermal paste, making it easier to remove. Use a gentle dabbing motion to avoid spreading the thermal paste further onto the pins.
Also Read: How to Calculate Cpu – Tools and Techniques for Optimal Performance!
Use a Soft-Bristled Brush:
Using a soft-bristled brush, gently brush the CPU pins in the same direction as the pins. This helps to loosen and remove the thermal paste without bending or damaging the pins. Be patient and apply gentle pressure.
A soft-bristled brush can effectively dislodge the thermal paste from the pins without causing physical damage to the delicate metal. Ensure you brush in a consistent direction to avoid bending the pins.
Clean with Compressed Air:
Use compressed air to blow away any loosened thermal paste particles. Hold the can upright and use short bursts to avoid condensation. Compressed air helps remove small particles that may still be clinging to the pins after brushing. Using short bursts prevents any moisture from the compressed air can from getting onto the CPU.
Repeat if Necessary:
Repeat the process of applying isopropyl alcohol, brushing, and using compressed air until the thermal paste is completely removed. Be thorough but gentle to avoid damaging the pins. Multiple passes may be necessary to completely remove all traces of thermal paste. Ensure each step is done carefully to prevent any damage to the CPU.
Final Cleaning:
Once the thermal paste is removed, use a clean, lint-free cloth dampened with isopropyl alcohol to gently wipe the area around the pins. Ensure no residue remains. This final wipe helps ensure that any remaining traces of thermal paste or alcohol are removed, leaving the CPU pins clean and ready for reinstallation.
Inspect and Dry:
Carefully inspect the CPU pins to ensure all thermal paste is removed. Allow the CPU to air dry completely before reinstallation. This usually takes a few minutes. Ensuring the CPU is completely dry prevents any potential damage when reinstalling it in the motherboard. A thorough inspection ensures no thermal paste remains, which could interfere with the CPU’s operation.
Tips for Preventing Thermal Paste from Getting on CPU Pins:
- Apply Thermal Paste Carefully: Use a small, pea-sized amount of thermal paste in the center of the CPU. Avoid spreading it manually. Proper application helps prevent excess paste from squeezing out and getting onto the pins.
- Use a Thermal Paste Spreader: If you prefer to spread the paste, use a dedicated spreader to control the application and avoid excess. A spreader provides better control over the paste application, reducing the risk of it getting onto the pins.
- Install the Cooler Gently: Place the cooler carefully and evenly on the CPU to prevent the thermal paste from being squeezed onto the pins. Even pressure ensures the paste spreads evenly without excess.
What to Do If CPU Pins Are Bent:
If you discover bent CPU pins during the cleaning process, you can try to gently straighten them using a mechanical pencil or a credit card. Be extremely careful, as bent pins can easily break. Straightening pins requires a steady hand and patience to avoid further damage. If you’re unsure, seek professional assistance.
When to Seek Professional Help:
If you’re uncomfortable with the process or if the CPU pins are heavily contaminated or damaged, it’s best to seek professional help. A technician can safely clean and repair your CPU, ensuring it functions correctly. Professional help ensures the CPU is cleaned without risk of further damage. It’s a safe option if you’re unsure about the cleaning process.
FAQ’s:
1. Why is it important to remove thermal paste from CPU pins?
Removing thermal paste from CPU pins is crucial because it can interfere with electrical connections, leading to poor performance or CPU failure.
2. What tools do I need to remove thermal paste from CPU pins?
You need isopropyl alcohol, a soft-bristled brush, cotton swabs, compressed air, a lint-free cloth, and optionally an anti-static wrist strap.
3. How should I apply isopropyl alcohol to the CPU pins?
Dampen a cotton swab with isopropyl alcohol and gently dab the affected area to dissolve the thermal paste.
4. What should I do if I bend a CPU pin while cleaning?
If a CPU pin gets bent, gently straighten it using a mechanical pencil or credit card, but be extremely careful to avoid breaking it.
5. When should I seek professional help for cleaning thermal paste from CPU pins?
Seek professional help if you are uncomfortable with the process or if the CPU pins are heavily contaminated or damaged.
Conclusion:
Removing thermal paste from CPU pins requires patience and a delicate touch. By following these steps, you can safely clean your CPU and ensure it performs optimally. Remember to take preventive measures when applying thermal paste in the future to avoid this issue. If in doubt, don’t hesitate to consult a professional to avoid potential damage to your CPU. Proper care and cleaning help maintain your CPU’s performance and longevity.