Undervolting your CPU reduces its voltage, leading to lower temperatures, enhanced energy efficiency, and quieter operation.
This guide provides a comprehensive step-by-step process for undervolting a CPU using Gigabyte BIOS.
Why Undervolt Your CPU?

Undervolting your CPU can bring a host of benefits, making it an attractive option for many users. By reducing the voltage supplied to your CPU, you can achieve lower temperatures, which is especially beneficial for maintaining optimal performance and extending the lifespan of your hardware.
Additionally, undervolting can enhance energy efficiency, leading to potential cost savings on your electricity bill. A cooler CPU also means your cooling system won’t have to work as hard, resulting in a quieter operation. Overall, undervolting can create a more efficient, cost-effective, and pleasant computing experience.
Precautions Before You Start:
Before you begin the process of undervolting your CPU, it’s crucial to take some precautions to ensure the safety and stability of your system. Start by backing up all important data to prevent any loss in case something goes wrong.
Make sure your BIOS is updated to the latest version, as newer versions often come with improvements and bug fixes. Additionally, understand that while undervolting is generally safe, incorrect settings can cause system instability or crashes. Proceed with caution and be prepared to make incremental adjustments.
Accessing Gigabyte BIOS:
To access the Gigabyte BIOS, restart your computer and enter the BIOS setup. As your system restarts, repeatedly press the Delete key (or F2 on some models) to enter the BIOS menu.
Once inside, you will navigate through various tabs and settings to locate the voltage controls necessary for undervolting your CPU. Accessing the BIOS is the first step towards making precise adjustments to your CPU voltage.
Gigabyte Undervolt Cpu:
Undervolting a CPU on a Gigabyte motherboard involves reducing the CPU’s voltage to lower heat output and improve power efficiency without sacrificing performance.
This can be done through the BIOS by adjusting the CPU Vcore settings. Undervolting can help extend the lifespan of your CPU while keeping it cooler during demanding tasks like gaming or video editing.
Step-by-Step Guide to Undervolt Your CPU:
Step 1: Locate Voltage Settings
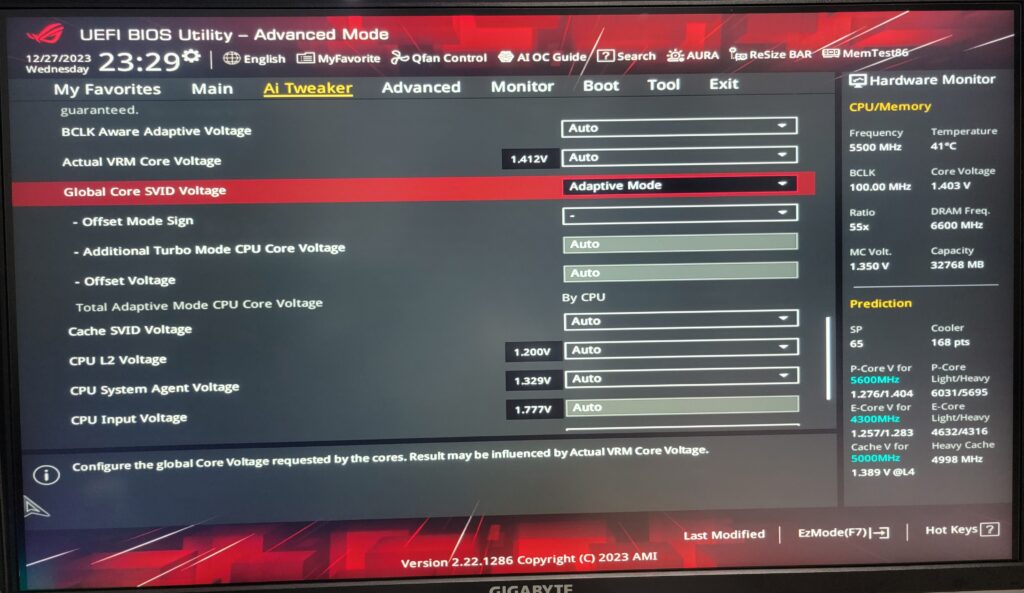
In the BIOS menu, navigate to the M.I.T. (Motherboard Intelligent Tweaker) tab. Under this tab, find Advanced Voltage Settings or similar options. This section contains the controls you need to adjust the CPU voltage.
Step 2: Adjust CPU Core Voltage
Once you have located the voltage settings, select CPU Vcore or CPU Core Voltage Control. Switch from Auto mode to Manual or Offset Mode to manually adjust the voltage.
Also Read: How To Split 8 Pin Cpu Connector – A Comprehensive Guide!
Step 3: Reduce Voltage
Begin by reducing the voltage in small increments, such as -0.05V. After making the adjustment, save your changes and exit the BIOS. Your system will restart, applying the new voltage settings.
Step 4: Test Stability
After your system restarts, boot into your operating system and run stress testing software like Prime95 or AIDA64. Monitor CPU temperatures and system performance to ensure stability. If your system remains stable, you can further reduce the voltage in small increments.
Fine-Tuning:
Finding the optimal undervolt setting requires fine-tuning. Repeat the adjustment process if your system is stable, further reducing the voltage incrementally.
If your system becomes unstable or crashes, increase the voltage slightly until stability is restored. Continue this process until you find the perfect balance where your system is stable, cool, and performs efficiently.
Common Issues and Solutions:
If your system crashes or fails to boot after undervolting:
- Enter the BIOS and slightly increase the voltage.
- Monitor for performance drops, which can indicate you’ve undervolted too much.
- Incrementally increase the voltage until the performance stabilizes.
- Ensuring stability and performance while undervolting might take a few adjustments, but it’s worth the effort.
FAQ’s
1. What is CPU undervolting?
Undervolting reduces the voltage supplied to the CPU to lower temperatures and improve energy efficiency.
2. Why should I undervolt my CPU?
Undervolting helps achieve lower temperatures, better energy efficiency, quieter operation, and extended hardware lifespan.
3. What precautions should I take before undervolting?
Backup important data, ensure your BIOS is updated, and understand that incorrect settings can cause instability.
4. How do I access the Gigabyte BIOS?
Restart your computer and repeatedly press the Delete key (or F2 on some models) to enter the BIOS setup.
5. Where can I find the voltage settings in Gigabyte BIOS?
Navigate to the M.I.T. tab and find the Advanced Voltage Settings section to adjust the CPU voltage.
6. How do I adjust the CPU core voltage in Gigabyte BIOS?
Select CPU Vcore or CPU Core Voltage Control, switch from Auto to Manual or Offset Mode, and adjust the voltage.
7. How much should I reduce the CPU voltage?
Start by reducing the voltage in small increments, such as -0.05V, and gradually find the optimal setting.
8. How do I test the stability after undervolting?
Boot into your operating system and run stress testing software like Prime95 or AIDA64 to monitor stability and performance.
9. What should I do if my system crashes after undervolting?
Enter the BIOS and slightly increase the voltage until stability is restored.
10. What if I notice a performance drop after undervolting?
Incrementally increase the voltage until the performance stabilizes, ensuring you don’t undervolt too much.
Conclusion
Undervolting your CPU using Gigabyte BIOS can significantly improve your PC’s efficiency and quietness. By following this guide, you can safely and effectively reduce your CPU voltage, ensuring a cooler and more stable system. Remember to proceed with caution and make incremental adjustments to find the optimal settings for your setup. If you found this guide helpful, feel free to share it with others looking to optimize their PC performance. Happy tweaking!


